")
")
Schibot Garne Blog/News Navelli (Caitlin Hunter)
Navelli (Caitlin Hunter)
")
Navelli von Caitlin Hunter
Tolle Anleitung, wunderschönes Garn, perfekter Sitz!
Navelli by Caitlin Hunter
Great pattern, beautiful yarn, perfect fit!
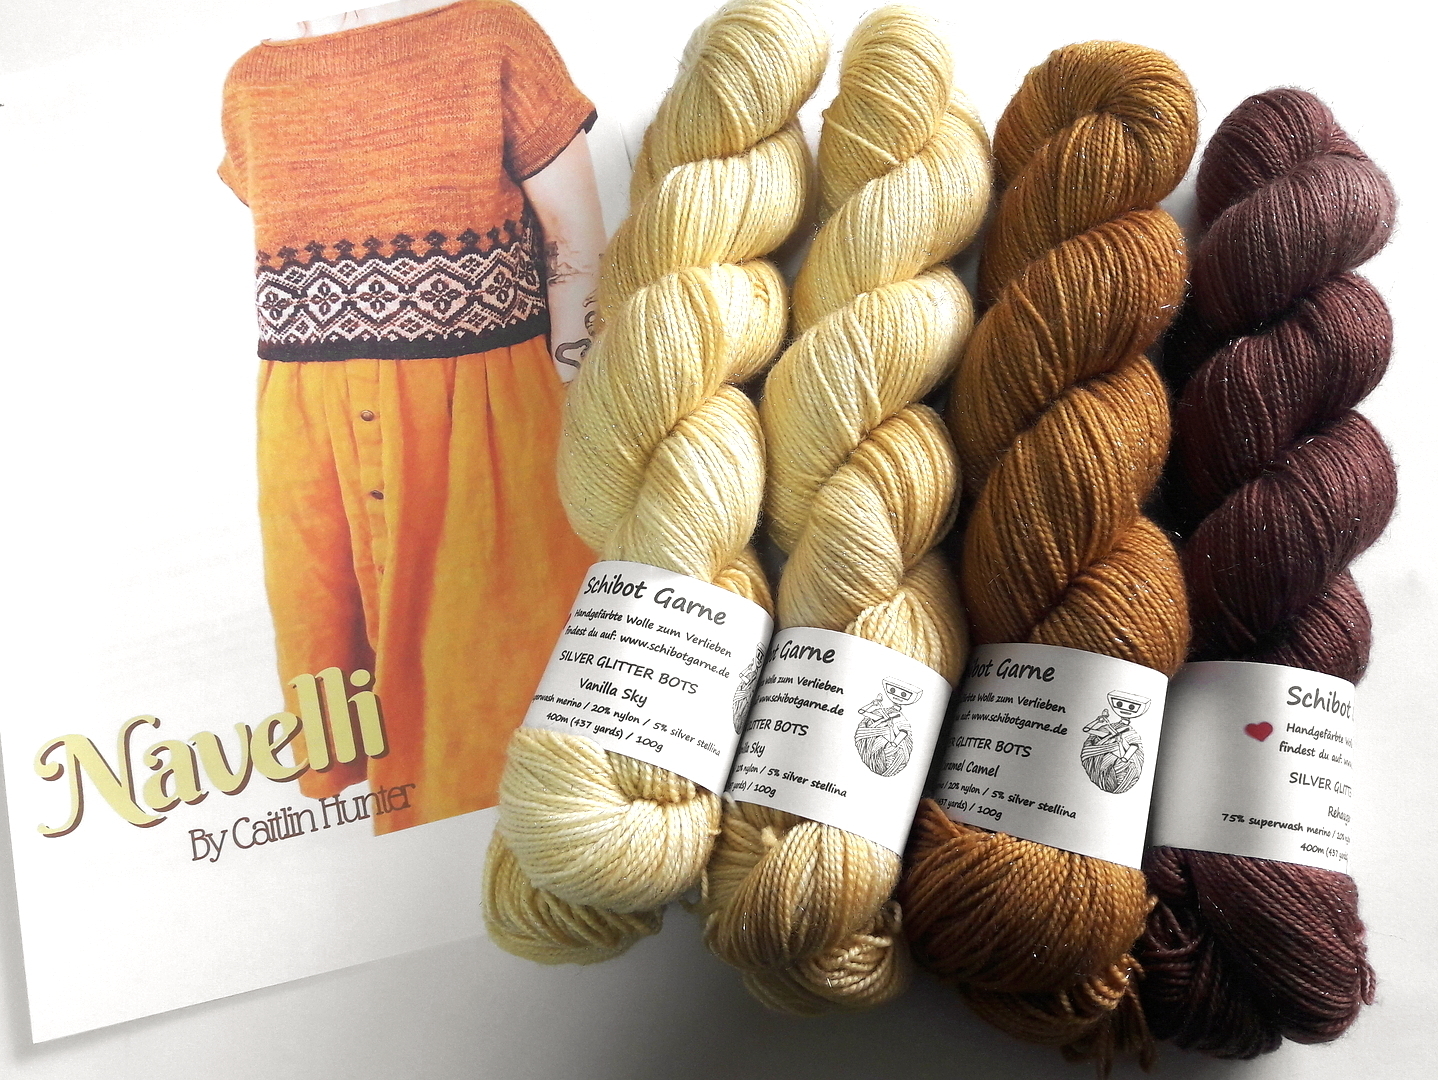
Letzten Monat hat Caitlin Hunter mal wieder eine neue Anleitung herausgebracht und ich hab mir sie sofort geholt. Navelli ist ein leichter Sommerpullover, der optisch wirklich viel hermacht. Man braucht drei verschiedene Farben und die Möglichkeiten dafür sind wirklich endlos!
Ich habe mich dieses Mal für etwas klassisch Elegantes entschieden: Vanilla Sky, Caramel Camel und Rehaugen auf den Silver Glitter Bots. So schnell hatte ich Wolle für ein Projekt noch nie gewickelt, ich wollte so schnell wie möglich loslegen. Doch zuerst musste ich ganz brav eine Maschenprobe stricken.
Last month Caitlin Hunter published a new pattern and I purchased it right away. Navelli is a light summer sweater that looks really pretty. You need three different colors and the choices are really endless!
This time I decided on something classically elegant: Vanilla Sky, Caramel Camel and Rehaugen dyed on the Silver Glitter Bots base. I had never caked yarn so quickly for a project before, but I wanted to get started as quickly as possible. But first I had to swatch.

Da ich von der Designerin bereits Tegna gestrickt hatte, wusst ich, dass die Maschenprobe wichtig ist. Ich hatte noch Reste der Garnbasis in den Farben Finsternis und Rauchzeichen. Damit habe ich das Muster in der Runde gestrickt und musste feststellen, dass ich auf jeden Fall 3.75mm Nadeln (statt 3.25mm laut Anleitung) für den Fair Isle Teil nehmen muss. Den Hauptteil, der glatt rechts gearbeitet wird, habe ich schließlich mit 3.25mm gestrickt.
Die angegebene Maschenprobe habe ich damit allerdings nicht erreicht. Statt 24 Maschen auf 30 Runden kam ich damit auf 26 Maschen auf 36 Runden. Daher war es nicht so ganz einfach, die richtige Größe für das Oberteil zu wählen. Ich hatte die Wahl zwischen Größe 2 und 3. Bei Größe 2 würde das Top enger sitzen, bei Größe 3 wäre es definitiv sehr oversized. Ich habe mich für die figurbetonte Variante entschieden. Bei den Ärmeln hatte ich jedoch Angst, dass die dann zu eng sitzen und habe diese in Größe 3 gestrickt.
Wie man sieht, Vorarbeit ist wichtig, wenn man am Ende ein Oberteil haben will, das sitzt und man gerne trägt. Also, immer brav eine Maschenprobe machen ;) Meine hier auf dem Bild ziert nun übrigens ein Glas Pesto :DD
Since I had already knitted Tegna by the designer, I knew that swatching was important. I still had some leftovers of the same yarn base in the colourways Finsternis and Rauchzeichen. With these I knitted the pattern in the round and had to find out that I had to take 3.75mm needles (instead of 3.25mm according to the instructions) for the Fair Isle part. The main part, which is worked in stockinette stitch, I knitted with 3.25mm.
However, I did not achieve gauge. Instead of 24 stitches and 30 rounds I got 26 stitches on 36 rounds. Therefore it was not that easy to choose the right size for the top. I had the choice between size 2 and 3. With size 2 the top would be more fitted, with size 3 it would definitely be very oversized. I chose the figure-hugging version. With the sleeves, however, I was afraid that they would sit too tight and knitted them in size 3.
As you can see, preliminary work is important if you want a top at the end that fits and you like to wear. So, always make a good swatch ;) By the way, mine here on the picture is now decorating a glass of Pesto :DD
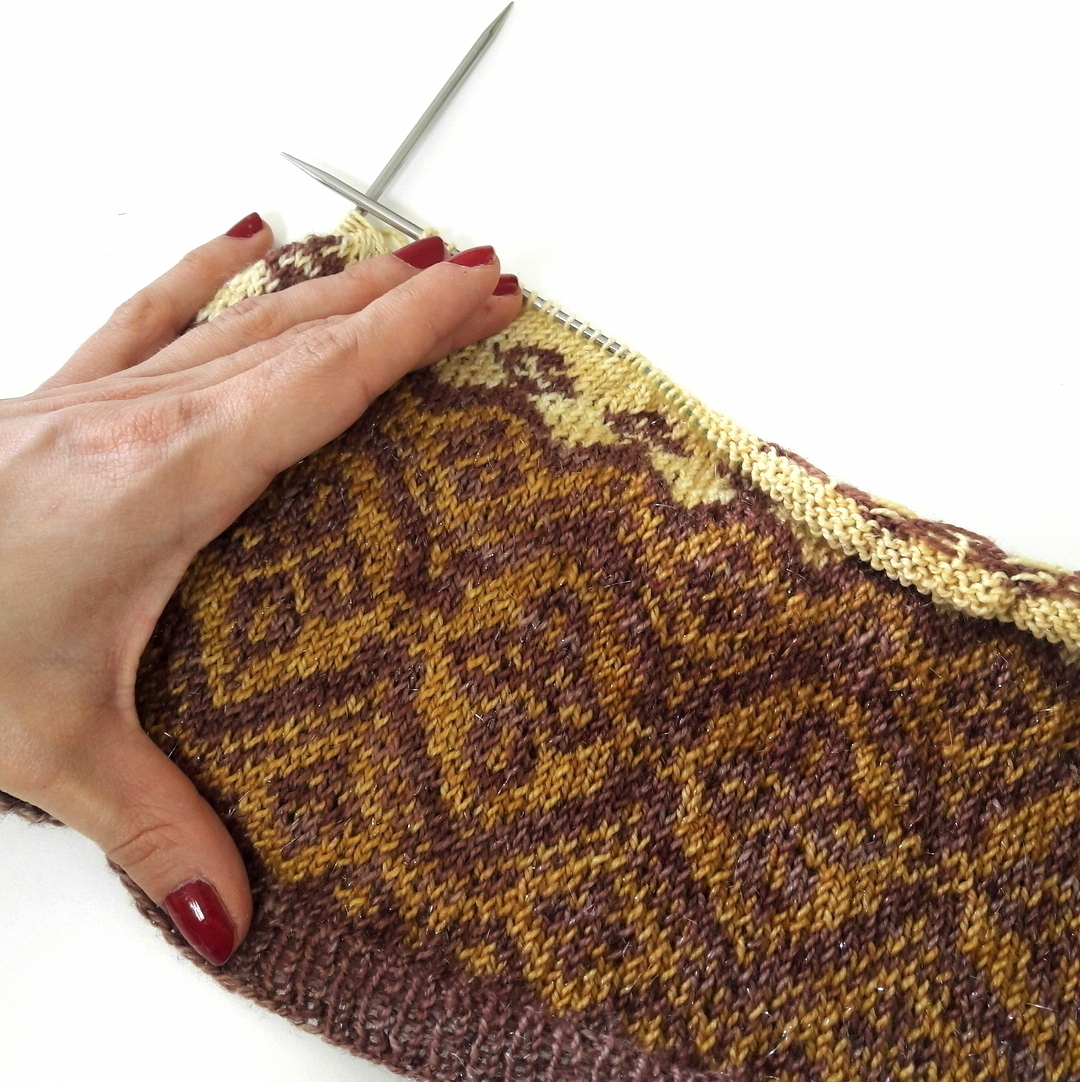
Das Top wird von unten nach oben in der Runde gestrickt. Für das Fair Isle Muster gibt es in der Anleitung ein Chart, dem ich sehr gut folgen konnte und dabei ist mir nicht ein einziger Fehler unterlaufen! Der Teil hat mir auf jeden Fall am meisten Spaß gemacht. Es gibt nur wenige Abschnitte, bei denen das Muster über so viele Maschen verläuft, dass man zusätzlich verkreuzen muss. Für Anfänger vielleicht nicht wirklich geeignet, aber wenn man schonmal ein Fair Isle Projekt gestrickt hat, denke ich, dass man sich da schon rantrauen darf.
Viel Wolle braucht man für diesen ersten Teil nicht. Von Rehaugen (dunkelbraun) habe ich insgesamt nur 40g verstrickt. Von Caramel Camel gerade mal 20g. Der Verbrauch hängt natürlich von der Größe ab, die man strickt, aber Caitlin hat in der Anleitung angegeben, dass von den beiden Kontrastfarben bei allen Größen jeweils ein Strang reicht.
The top is knitted in the round from the bottom up . For the Fair Isle pattern there is a chart in the pattern manual, which I was able to follow very easily and I didn't make a single mistake! This part was definitely the most fun for me. There are only a few sections where one colour runs over so many stitches that you have to catch the floats additionally. Maybe not really suitable for beginners, but if you've ever done a Fair Isle project, I think you could try it.
You don't need much yarn for this first part. I only used 40g of Rehaugen (dark brown) and just 20g of Caramel Camel. Of course, the consumption depends on the size you knit, but Caitlin stated in the instructions that one skein of each of the two contrasting colours is enough for all sizes.
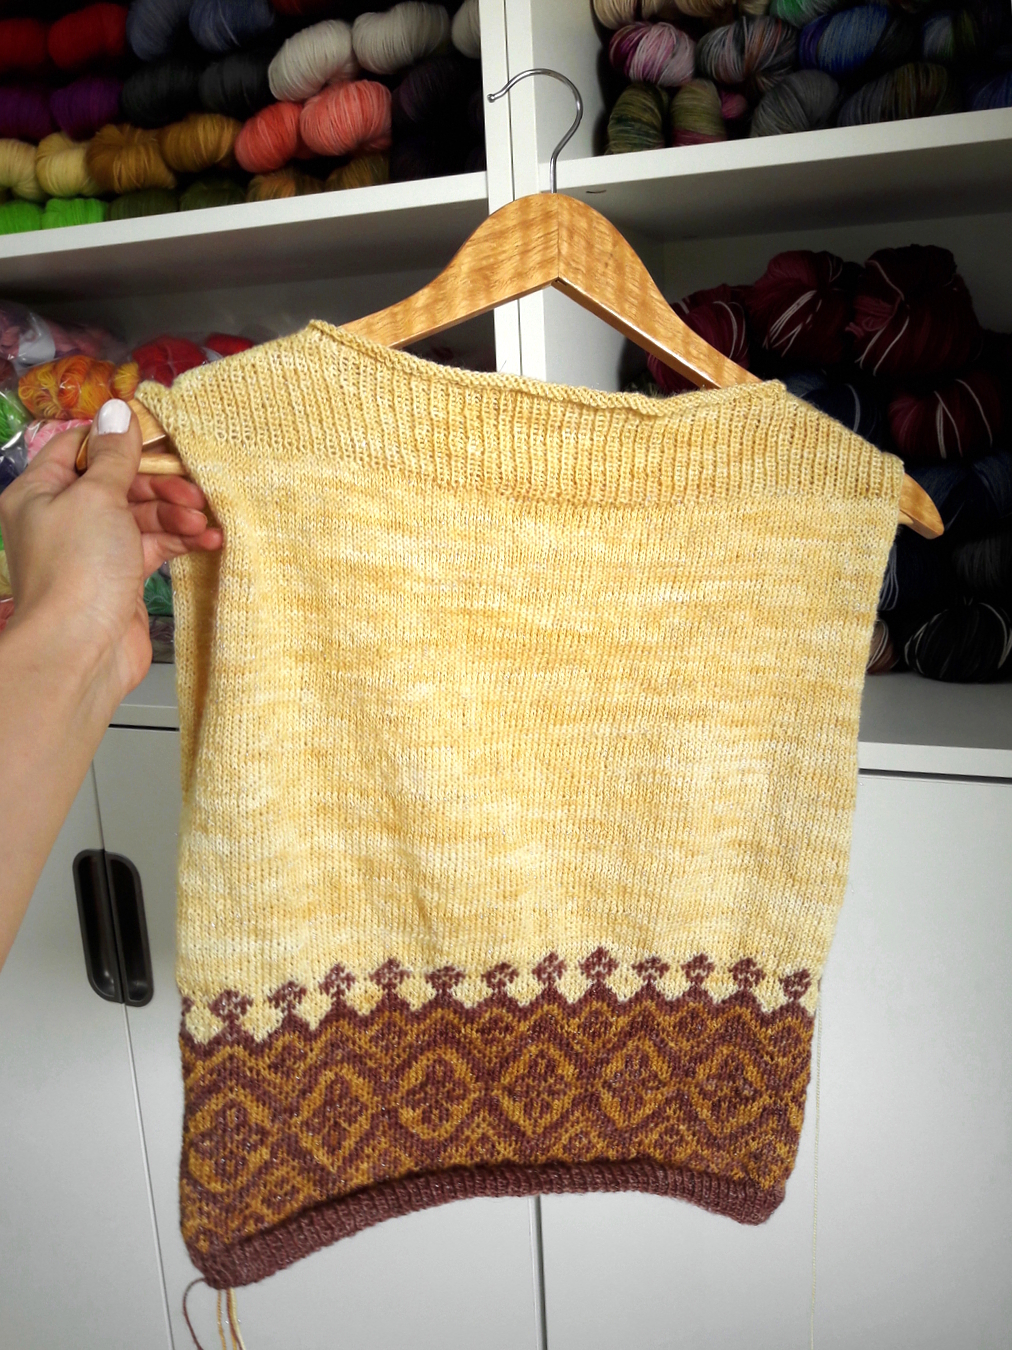 Daraufhin ging es sehr einfach in der Hauptfarbe weiter. Glatt rechts in der Runde, keine Abnahmen, nur viele, viele rechte Maschen. Zu dem Zeitpunkt war das Projekt absolut fernsehtauglich. Ich habe mich dazu entschieden, es etwas länger zu machen, als in der Anleitung beschrieben. Das waren zwar nur zwei Zentimeter, aber die waren nötig, denn sonst wäre das Oberteil bauchfrei geworden.
Dann wurde es wieder etwas spannender. Die Arbeit wurde geteilt und Rücken- und Vorderteil getrennt voneinander gestrickt. Erst der Rücken mit verkürzten Reihen und dann stand da in der Anleitung, man solle das Vorderteil ganz genauso stricken. Das hat mich erst etwas verwirrt, weil ich davon ausgegangen bin, dass durch die verkürzten Reihen (ich habe übrigens "German short rows" gestrickt und nicht die "wrap and turn" - Methode verwendet) das Rückenteil angehoben wird. Doch die verkürzten Reihen formen die Schultern. Noch besser, weniger denken und das Gleiche einfach nochmal machen.
Der Ausschnitt im Rippenmuster gefällt mir sehr gut. Da ich die Maschen auf Seilen stillgelegt hatte (ich liebe mein Interchangeable Set von HiyaHiya!), waren auch die Schulternähte schnell geschlossen. Erste Anprobe und es passte perfekt!
Then it went on very simply using the main colour. Stockinette in the round, no decreases, only many, many knit stitches. At that time the project was perfect for TV knitting. I decided to make the top a bit longer than described in the pattern. That was only two centimeters, but they were necessary, because otherwise the top would have been belly free.
After that it became more exciting again. The work was divided and the back and front were knitted separately. First the back with short rows and then I read that I had to knitthe front part in exactly the same way. That confused me a bit at first, because I assumed that the short rows (by the way I knitted "German short rows" and did not use the "wrap and turn" method) would lift the back. But the short rows form the shoulders. Even better, less thinking, simply doing the same thing again.
I like the neckline in the ribbing pattern very much. Since I used cables to put the stitches on hold (I love my Interchangeable Set from HiyaHiya!), the shoulder seams were also quickly closed. First first try on and it fitted perfectly!
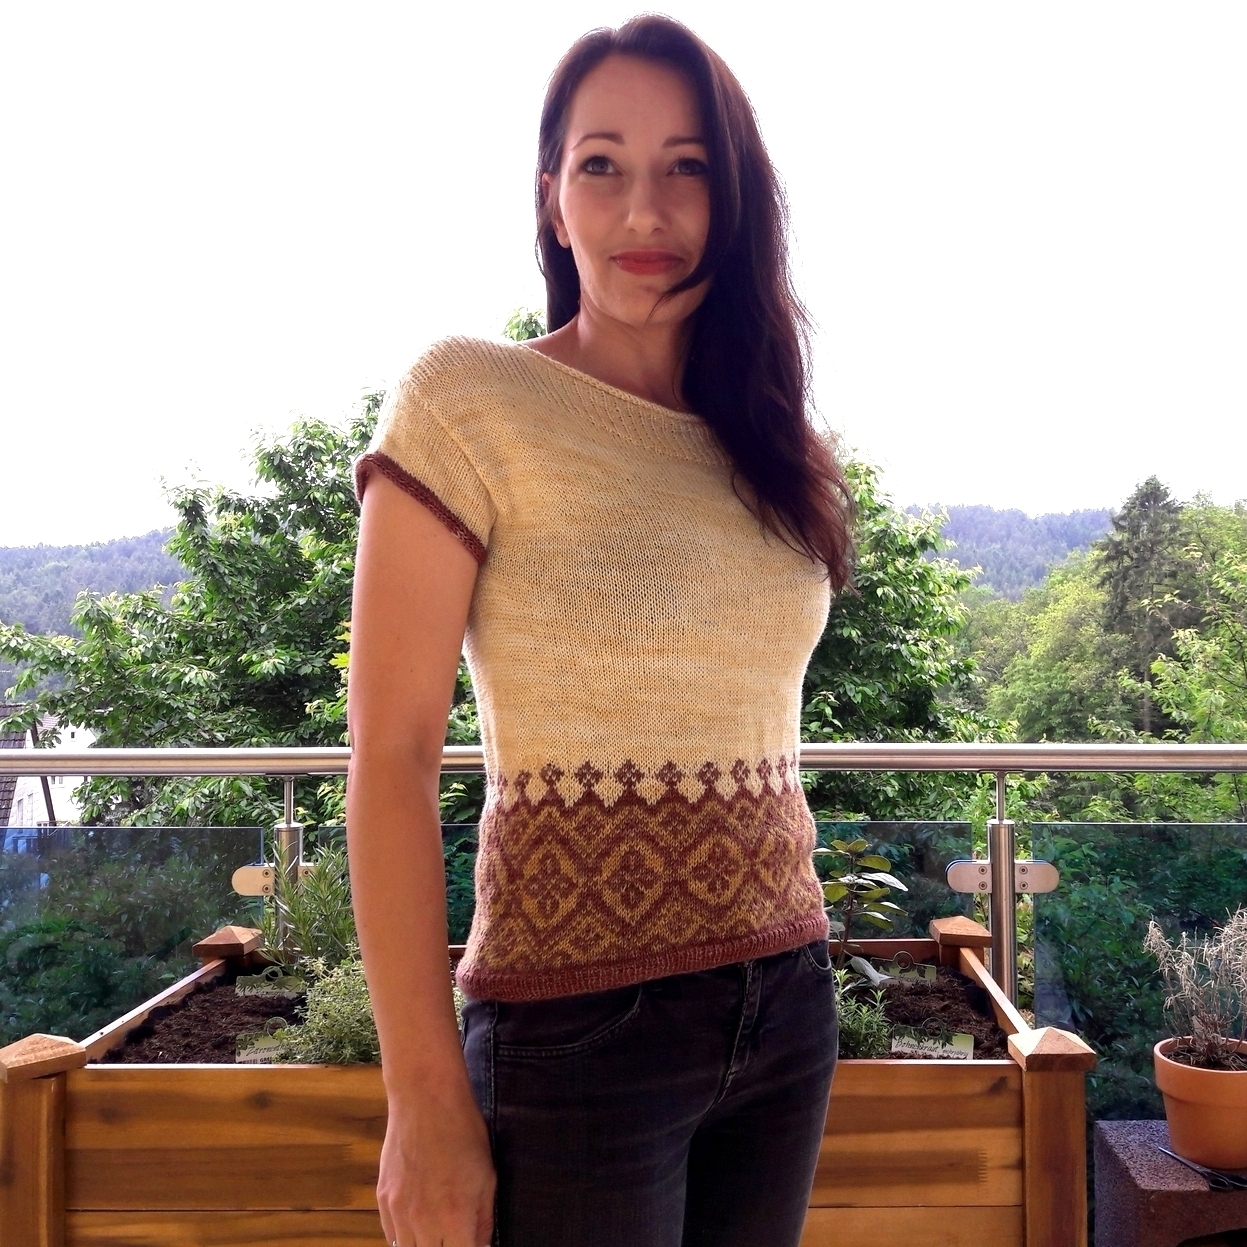
Nachdem ich den ersten Ärmel gestrickt hatte, stellte ich fest, dass mir der Look und das Gefühl des gefalteten Ärmels nicht gefielen. Also hab ich ihn wieder aufgetrennt, schlief eine Nacht darüber und fing am nächsten Tag von vorne an, um ein paar Änderungen vorzunehmen. Zuerst arbeitete ich 5cm mit der Hauptfarbe, dann 1cm mit Rehaugen und kettete schließlich mit einem I-Cord ab. Fertig! Perfekte Passform, perfekter Look. Ich liebe es so sehr!
Alles in allem brauchte ich für mein Navelli nur 1,7 Stränge Garn (110g der Hauptfarbe + 60g der Kontrastfarben). Ehrlich? Das ist nichts! Außerdem habe ich keinen Monat gebraucht, um das Oberteil zu stricken. Wenn ich etwas mehr Zeit gehabt hätte, wäre es wahrscheinlich noch viel schneller fertig geworden. Der Sommer ist noch lang. Wenn du also noch auf der Suche nach einem schönen Top für die sonnige Jahreszeit bist, dann kann ich dir das Muster nur empfehlen!
Auf Instagram habe ich bereits Bilder gezeigt und wurde gefragt, ob ich für das Top nicht Kits zusammenstellen könnte. Spontan habe ich vier für euch kreiiert, die ihr nun hier in der Kategorie Kits finden könnt. Sie sind bereits gefärbt und versandfertig. Ich würde mich freuen, wenn sich noch mehr von euch diesen Sommer im Navelli Top zeigen ♥
After I had knitted the first sleeve I found out that I didn't like the look nor the feel of the folded sleeve. So I ripped it out, slept over it for a night and started over again the next day doing a few modifications. First I worked 5cm using the main colour, then 1cm using Rehaugen and finally ended with an I-Cord bind off. Finished! Perfect fit, perfekt look. Love it so much!
All in all I only needed 1.7 skeins of yarn to make my Navelli (110g of the main colour + 60g of the contrasting colours). Honestly? That's nothing! Besides, it didn't take me a month to knit the top. If I had had a little more time, it would probably have been finished much faster. Summer is still long. So if you are still looking for a nice top for the sunny season, then I can only recommend the pattern to you!
I have already shown pictures on Instagram and was asked if I could put together yarn sets for this top. I spontaneously created four kits for you, which you can now find here in the category Kits. They are already dyed and ready to ship. I would love to see more of you wearing the Navelli Tee this summer ♥
