")
")
Schibot Garne Blog/News 2020: Sorrel
2020: Sorrel

Sorrel
Vierter Pullover im Jahr 2020 ♥
Sorrel
Fourth sweater in 2020 ♥
[scroll down for English]
Hallo meine Lieben,
 in meiner ersten YouTube Folge habe ich es ja das erste Mal laut ausgesprochen: Ich habe mir tatsächlich vorgenommen dieses Jahr 12 Pullover zu stricken! Und heute kann ich euch ganz stolz Nummer vier zeigen: Mein Sorrel Pullover! Doch bevor ich mehr dazu erzähle, möchte ich mich ganz herzlich bei allen bedanken, die sich bereits ein Kit für den Sorrel gegönnt haben. Diese Woche färbe ich wie eine Verrückte Wolle für dieses Design und ich freue mich schon auf all die vielen Bilder eurer Sorrels!
Vielleicht ist der folgende Bericht über mein Sorrelabenteuer ja für den ein oder anderen hilfreich, der sich noch nicht ganz sicher ist, ob er diesen Pulli auch stricken soll. Also, holt euch ein Getränk, euer Strickzeug und viel Spaß beim Lesen ♥
Ich selbst bin auf den Sorrel durch Instagram aufmerksam geworden. Die ersten zwei Monate diesen Jahres war mein Feed voll mit unglaublich schönen Anstrickbildern dieses Pullis - eins schöner als das andere! Ich bin dann auf Ravelry gegangen und habe mir dort die Sorrelanleitungsseite etwas genauer angesehen. Dort habe ich dann herausgefunden, dass der Sorrel von AbbyeKnits und DankFiber ist, die sich zu einem Designerduo zusammengeschlossen haben, das sich Wool & Pine nennt. Sorrel ist erst ihr zweites Design und schon haben die beiden einen solchen Erfolg! Die Anleitung ist neben dem Englischen mittlerweile auch auf Französisch und Spanisch erhältlich.
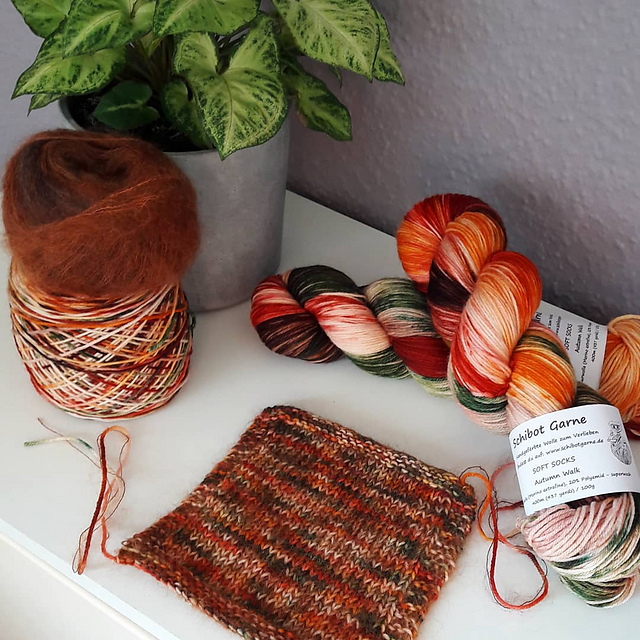
 Mir hat es so sehr in den Fingern gejuckt, den Pulli anzuschlagen und Mitte April war es dann so weit! Von Anfang an wusste ich, welche Farben es werden sollten: Die Soft Socks in der Farbe Autumn Walk kombiniert mit dem Mohairgarn Extraklasse in der Farbe 4452. Kaum war das Garn gewickelt, hatte ich eine Maschenprobe gemacht. Punktlandung! Also konnte es los gehen.
An dem Tag war es schön und ich wollte draußen auf der Terrasse stricken. Kaffee, ausgedruckte Anleitung, Wolle, Nadeln, alles da. Ging auch wunderbar, das Halsbündchen war schnell gestrickt und dann ging es auch schon mit dem Muster los. Diese eine bestimmte Masche wird in der Anleitung nicht erklärt, aber ich sah, dass da ein Link aufgeführt wurde, der mich zu einem Videotutorial führt. Nur konnte ich nichts anklicken, ich hatte die Anleitung ja nur auf Papierform dabei. Ja, ich hätte natürlich reingehen und den PC anwerfen können, aber - ich hoffe, irgendeiner der hier mitliest versteht das! - es war gerade so schön und bequem draußen. Ich war mir ganz sicher, dass ich das Muster auch ohne Video hinbekomme, anhand der Bilder in der Anleitung. Nach etwa drei Musterwiederholungen war mir klar, dass das, was ich da mache, vollkommen falsch ist. Ab dem Zeitpunkt hatte ich noch ein wenig aus Trotz weitergestrickt. Bis ich den Pulli dann in die Projekttasche geworfen und erstmal in die Ecke gestellt hatte. Denn es war klar, das musste geribbelt werden.
 Es dauerte etwas, bis ich wieder Muße hatte, mich mit meinem Sorrel auseinanderzusetzen. Mittlerweile hatte ich schon versucht, ihn wieder aufzutrennen, aber mit Mohair ist das nahezu nicht schaffbar und für einen ungeduldigen Menschen wie mich, einfach ein Ding der Unmöglichkeit. Aber da ich das Tutorial nun angesehen und es "Klick" gemacht hatte, gab es nun auch kein Halten mehr. Also, wichtiger Tipp: schaut euch das Tutorial an, bevor ihr mit dem Muster beginnt!
Ich hatte am Anfang ein wenig Bedenken, wegen der Größe. Bei mir sah das Strickstück während des Musterstrickens sehr klein aus. Aber: einfach mal den Designern vertrauen! Die Größenangaben sind genau richtig - vorausgesetzt, die Maschenprobe passt! Anders als bei vielen deutschen und europäischen Anleitungen, werden die Größen nicht in S, M, L, XL,... angegeben. Und das ist auch gut so! Hab ich im ersten Laden Größe M, geh ich nächsten Laden mit einem Teil in Größe L raus. So etwas ist mir schon häufig passiert und ich weiß, dass ich nicht die einzige bin. Daher: wenn ihr mir schreibt, ihr würdet gerne einen Pulli in Größe M stricken und ich frag euch daraufhin nach eurem Brustumfang, dann bitte nicht wundern ;) Denn der Brustumfang macht als Größenangabe doch am meisten Sinn! Deswegen (da ich so viele Fragen bekomme): messt bitte euren Brustumfang und sucht euch anhand dieser Maße das Kit für euren Sorrel Pulli aus.
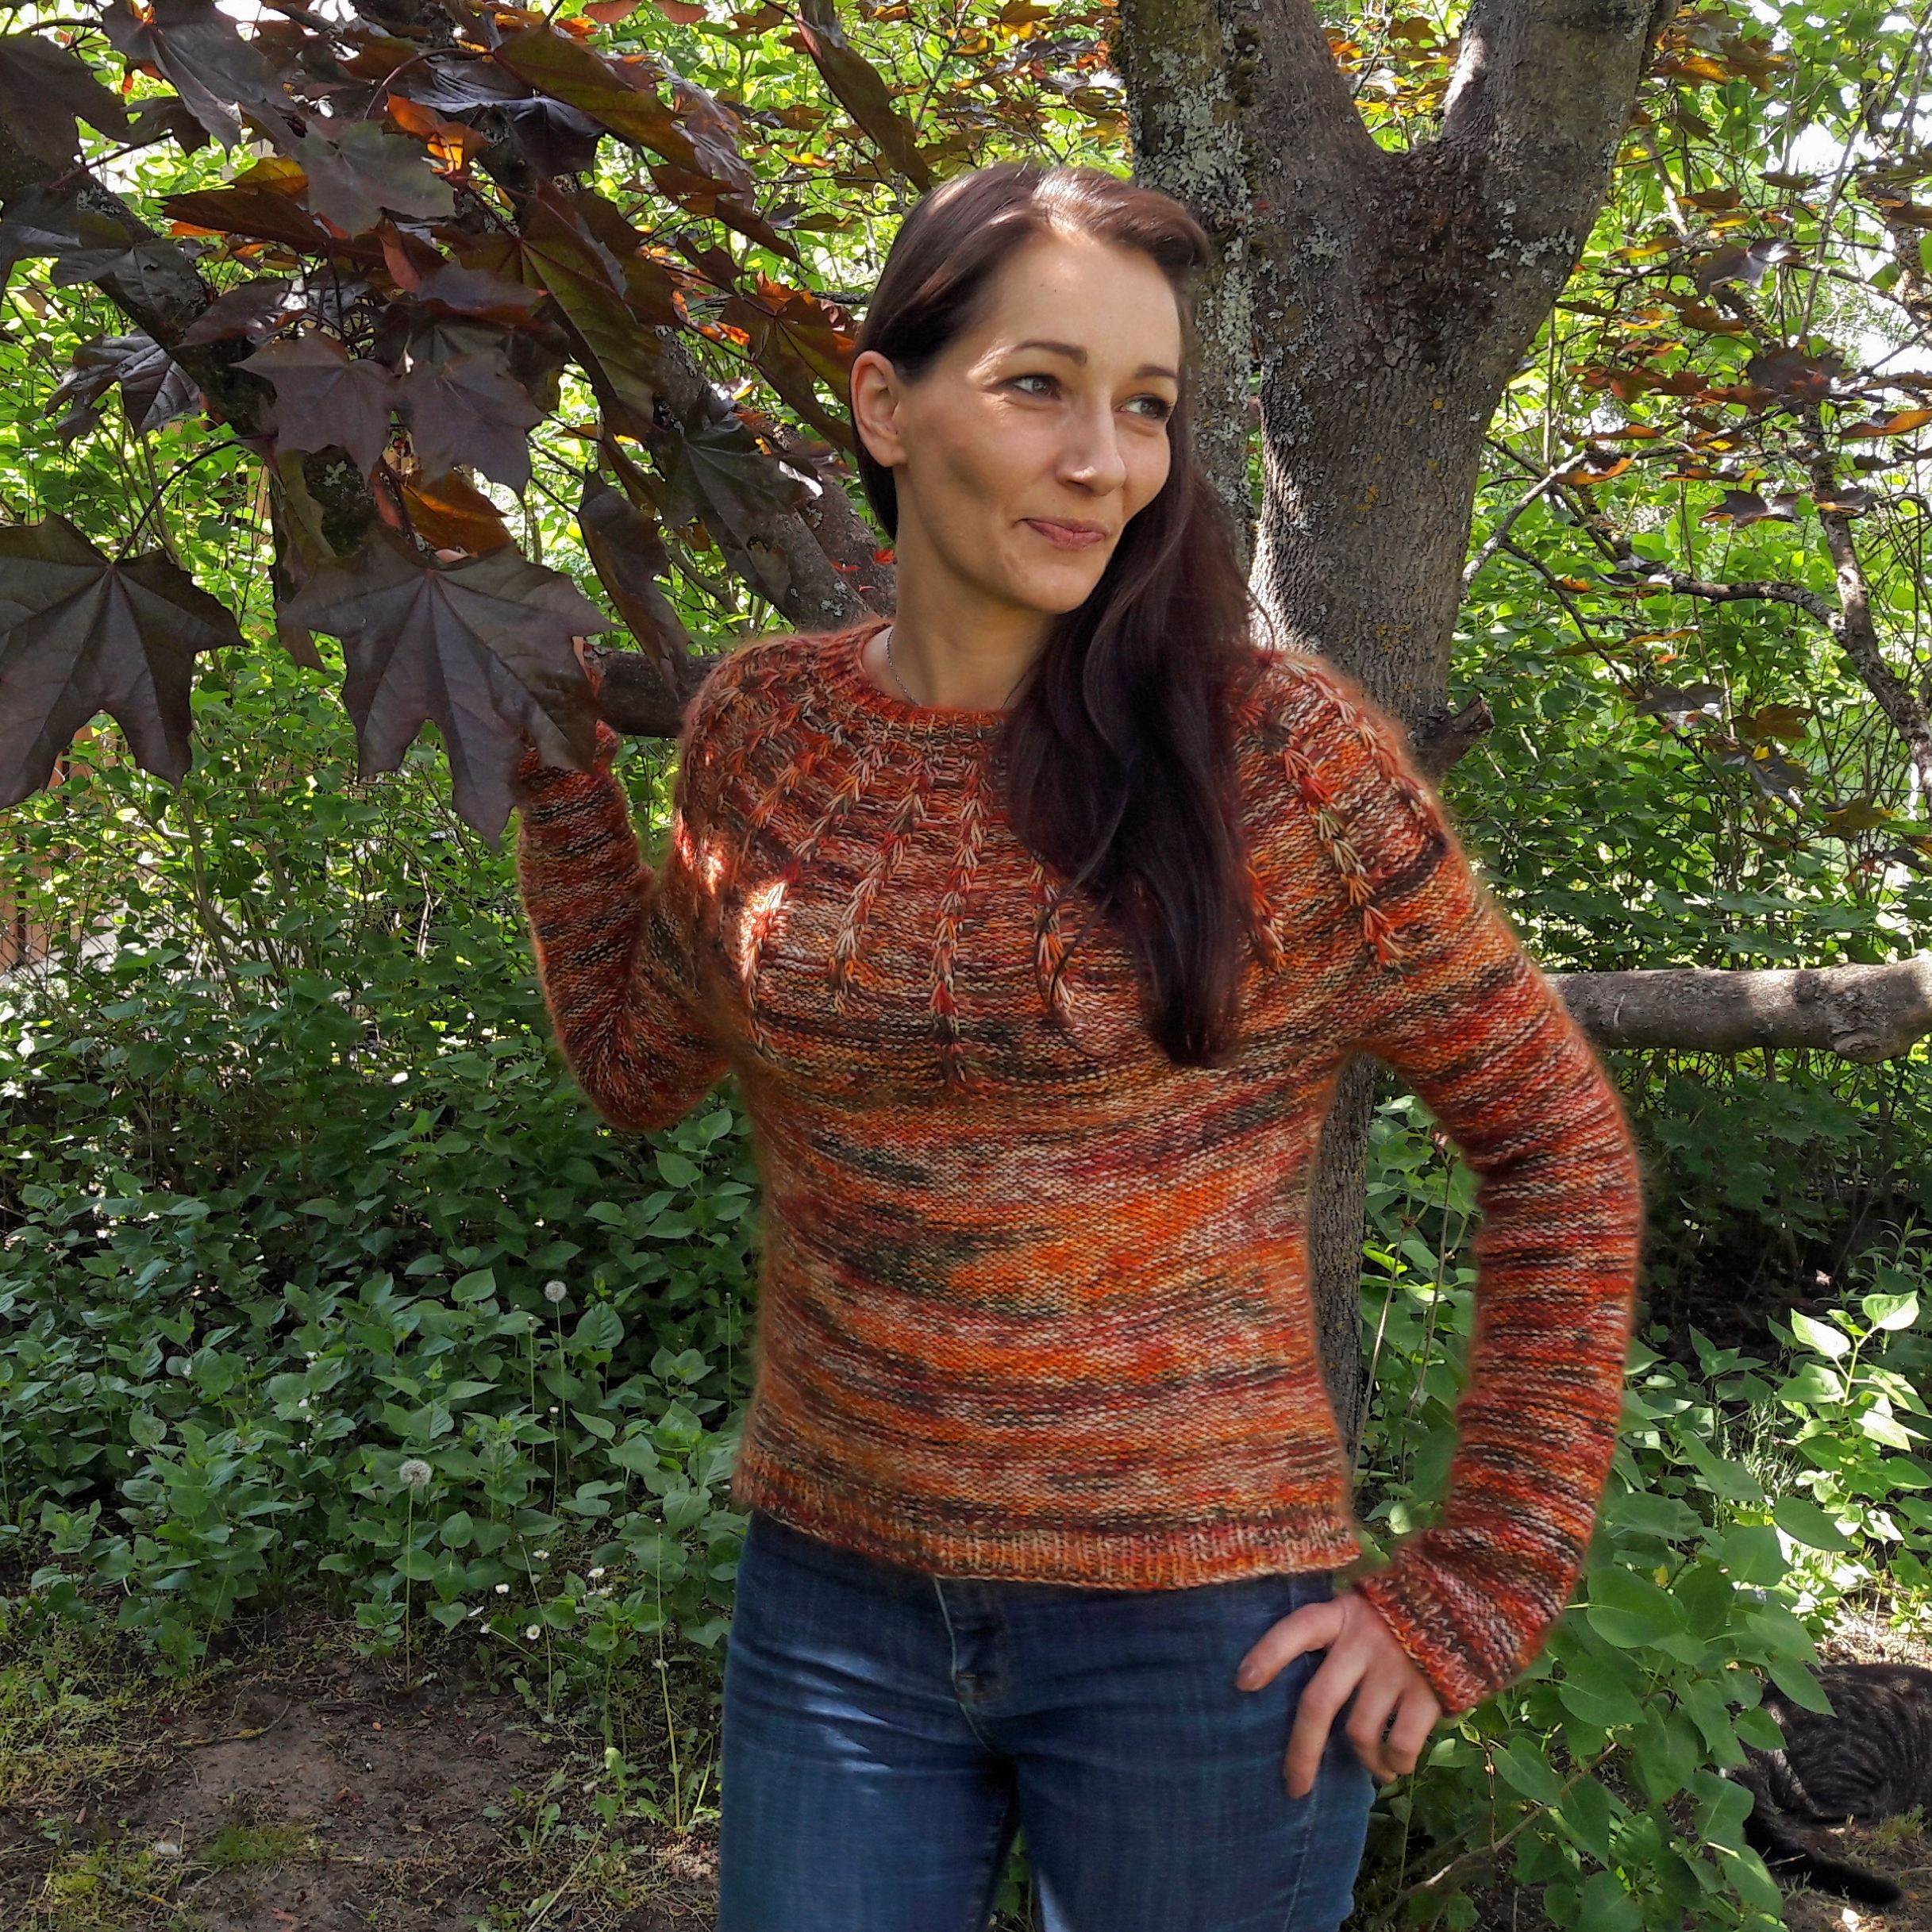
 Aber zurück zu meinem Projekt. Ich muss gestehen, dass mir das Stricken des wunderschönen Musters erst nicht so viel Freude gemacht hatte. Ich nehme aber mal an, dass dies an meinem Fehlstart lag. Denn kaum waren die Ärmel stillgelegt, vermisste ich das Muster :)
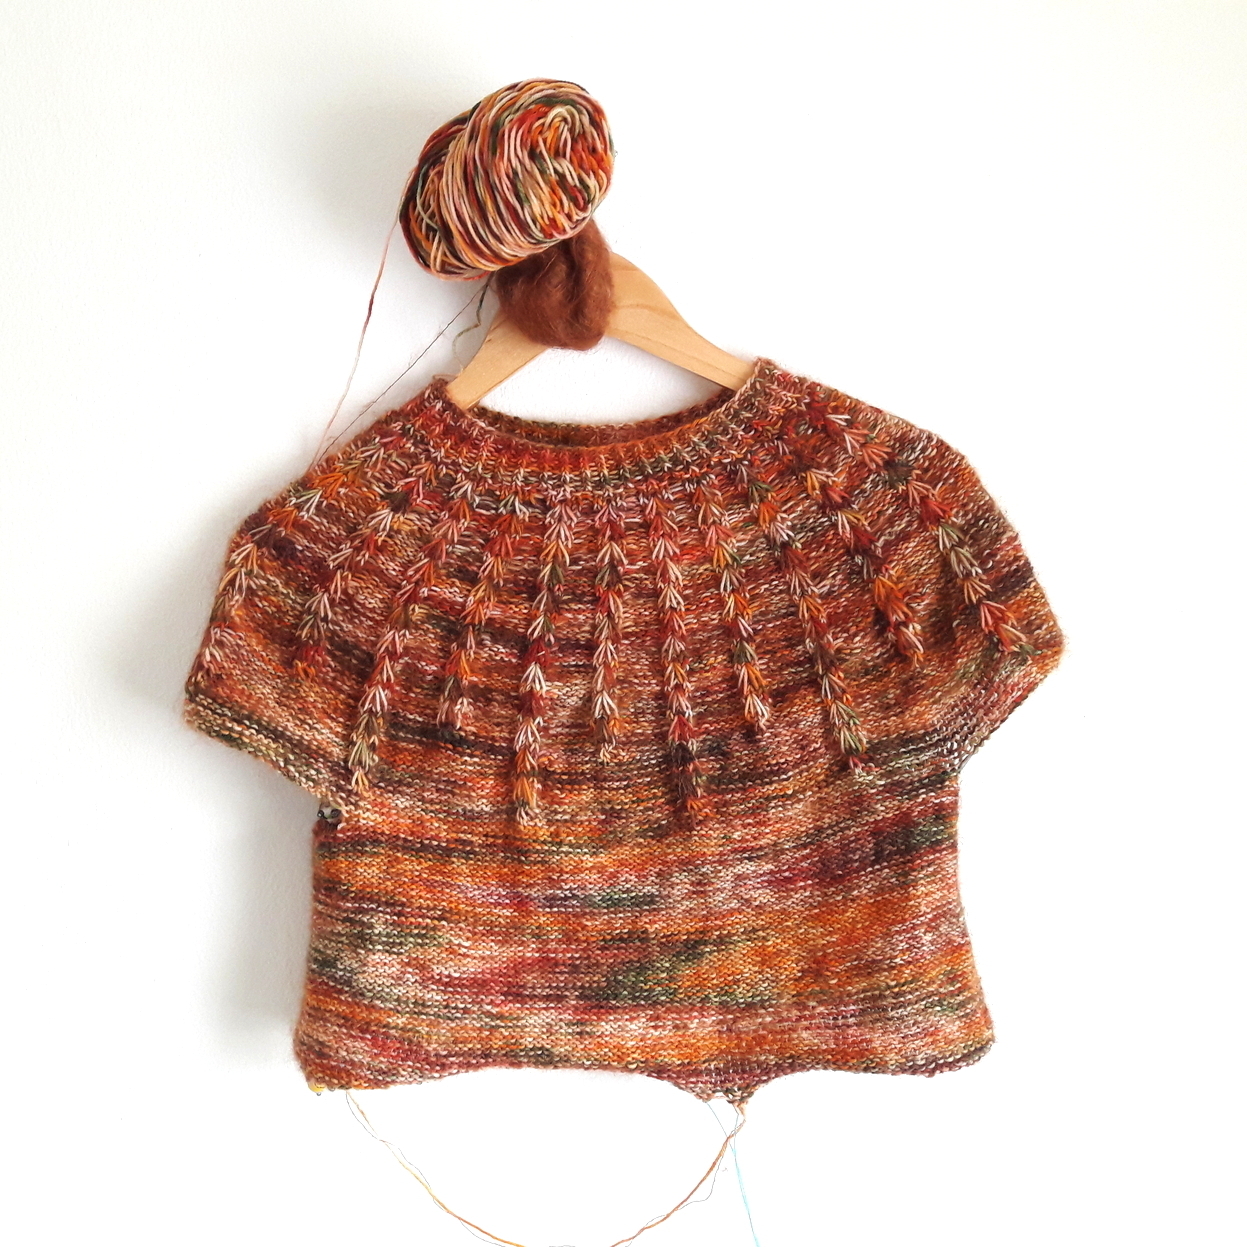
Bevor man die Ärmel jedoch stilllegt, werden am Rücken noch verkürzte Reihen gestrickt. Diese bewirken, dass das Rückenteil am Ende etwas höher liegt als der vordere Ausschnitt. Ich war sehr erfreut zu sehen, dass die Designer bereits "german short rows" verwenden und ich nichts umrechnen musste. Häufig verwenden amerikanische Anleitungen die "wrap and turn" Methode, bei der dann aber leider unhübsche kleiner Löcher entstehen. Deswegen Daumen nach oben für diese Anleitung!
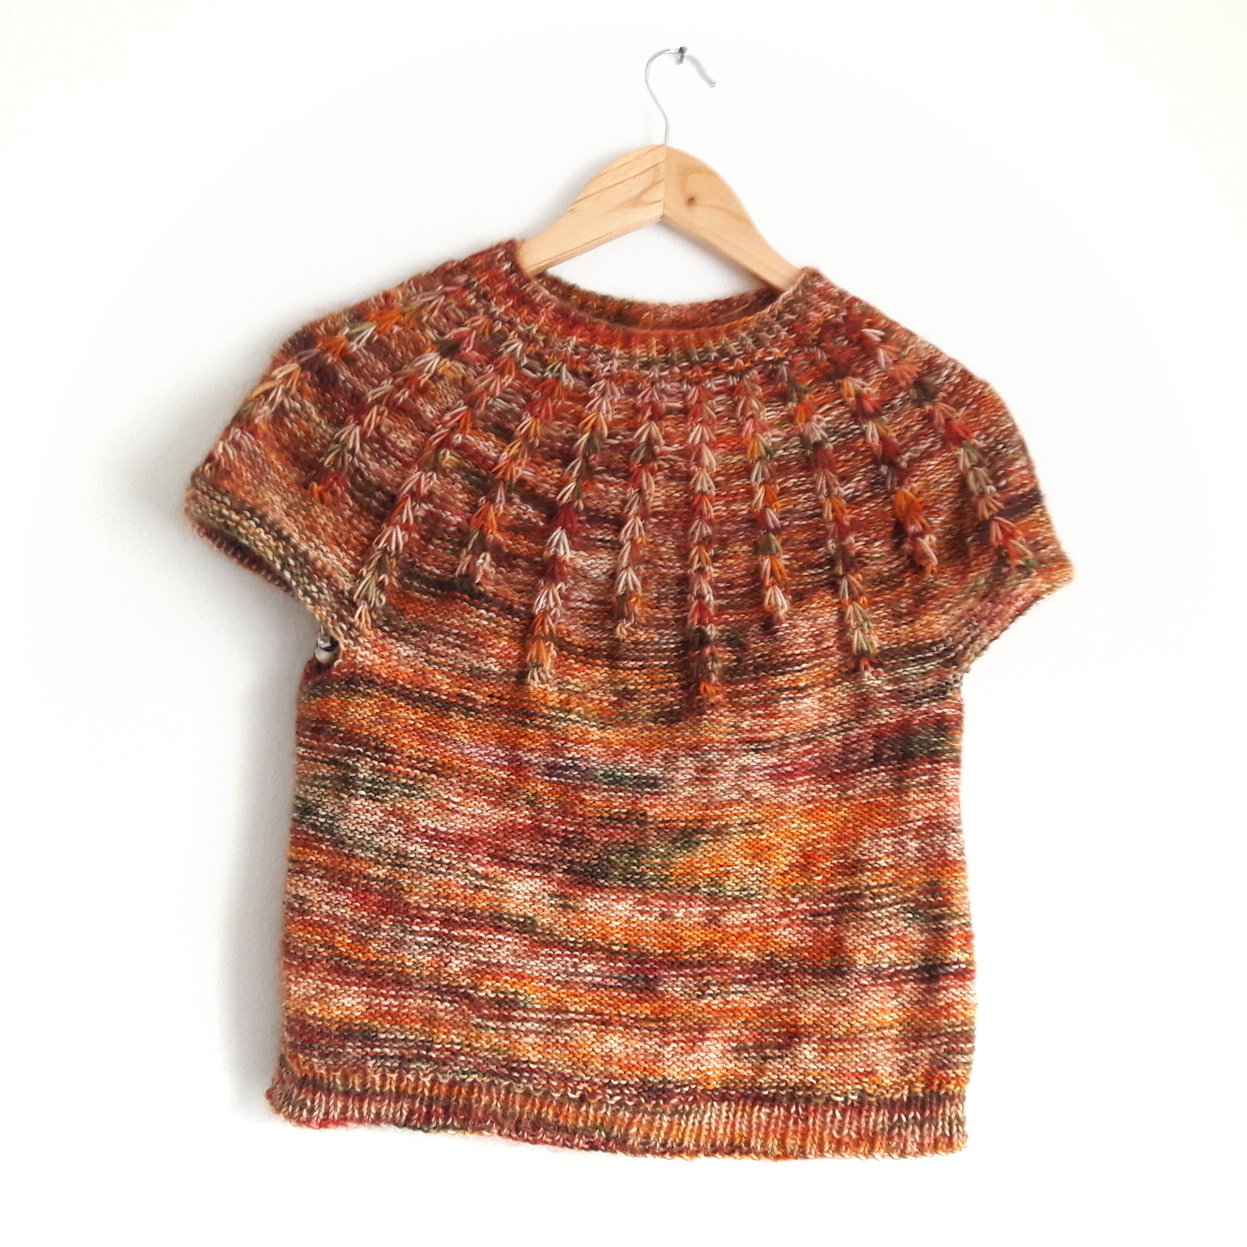
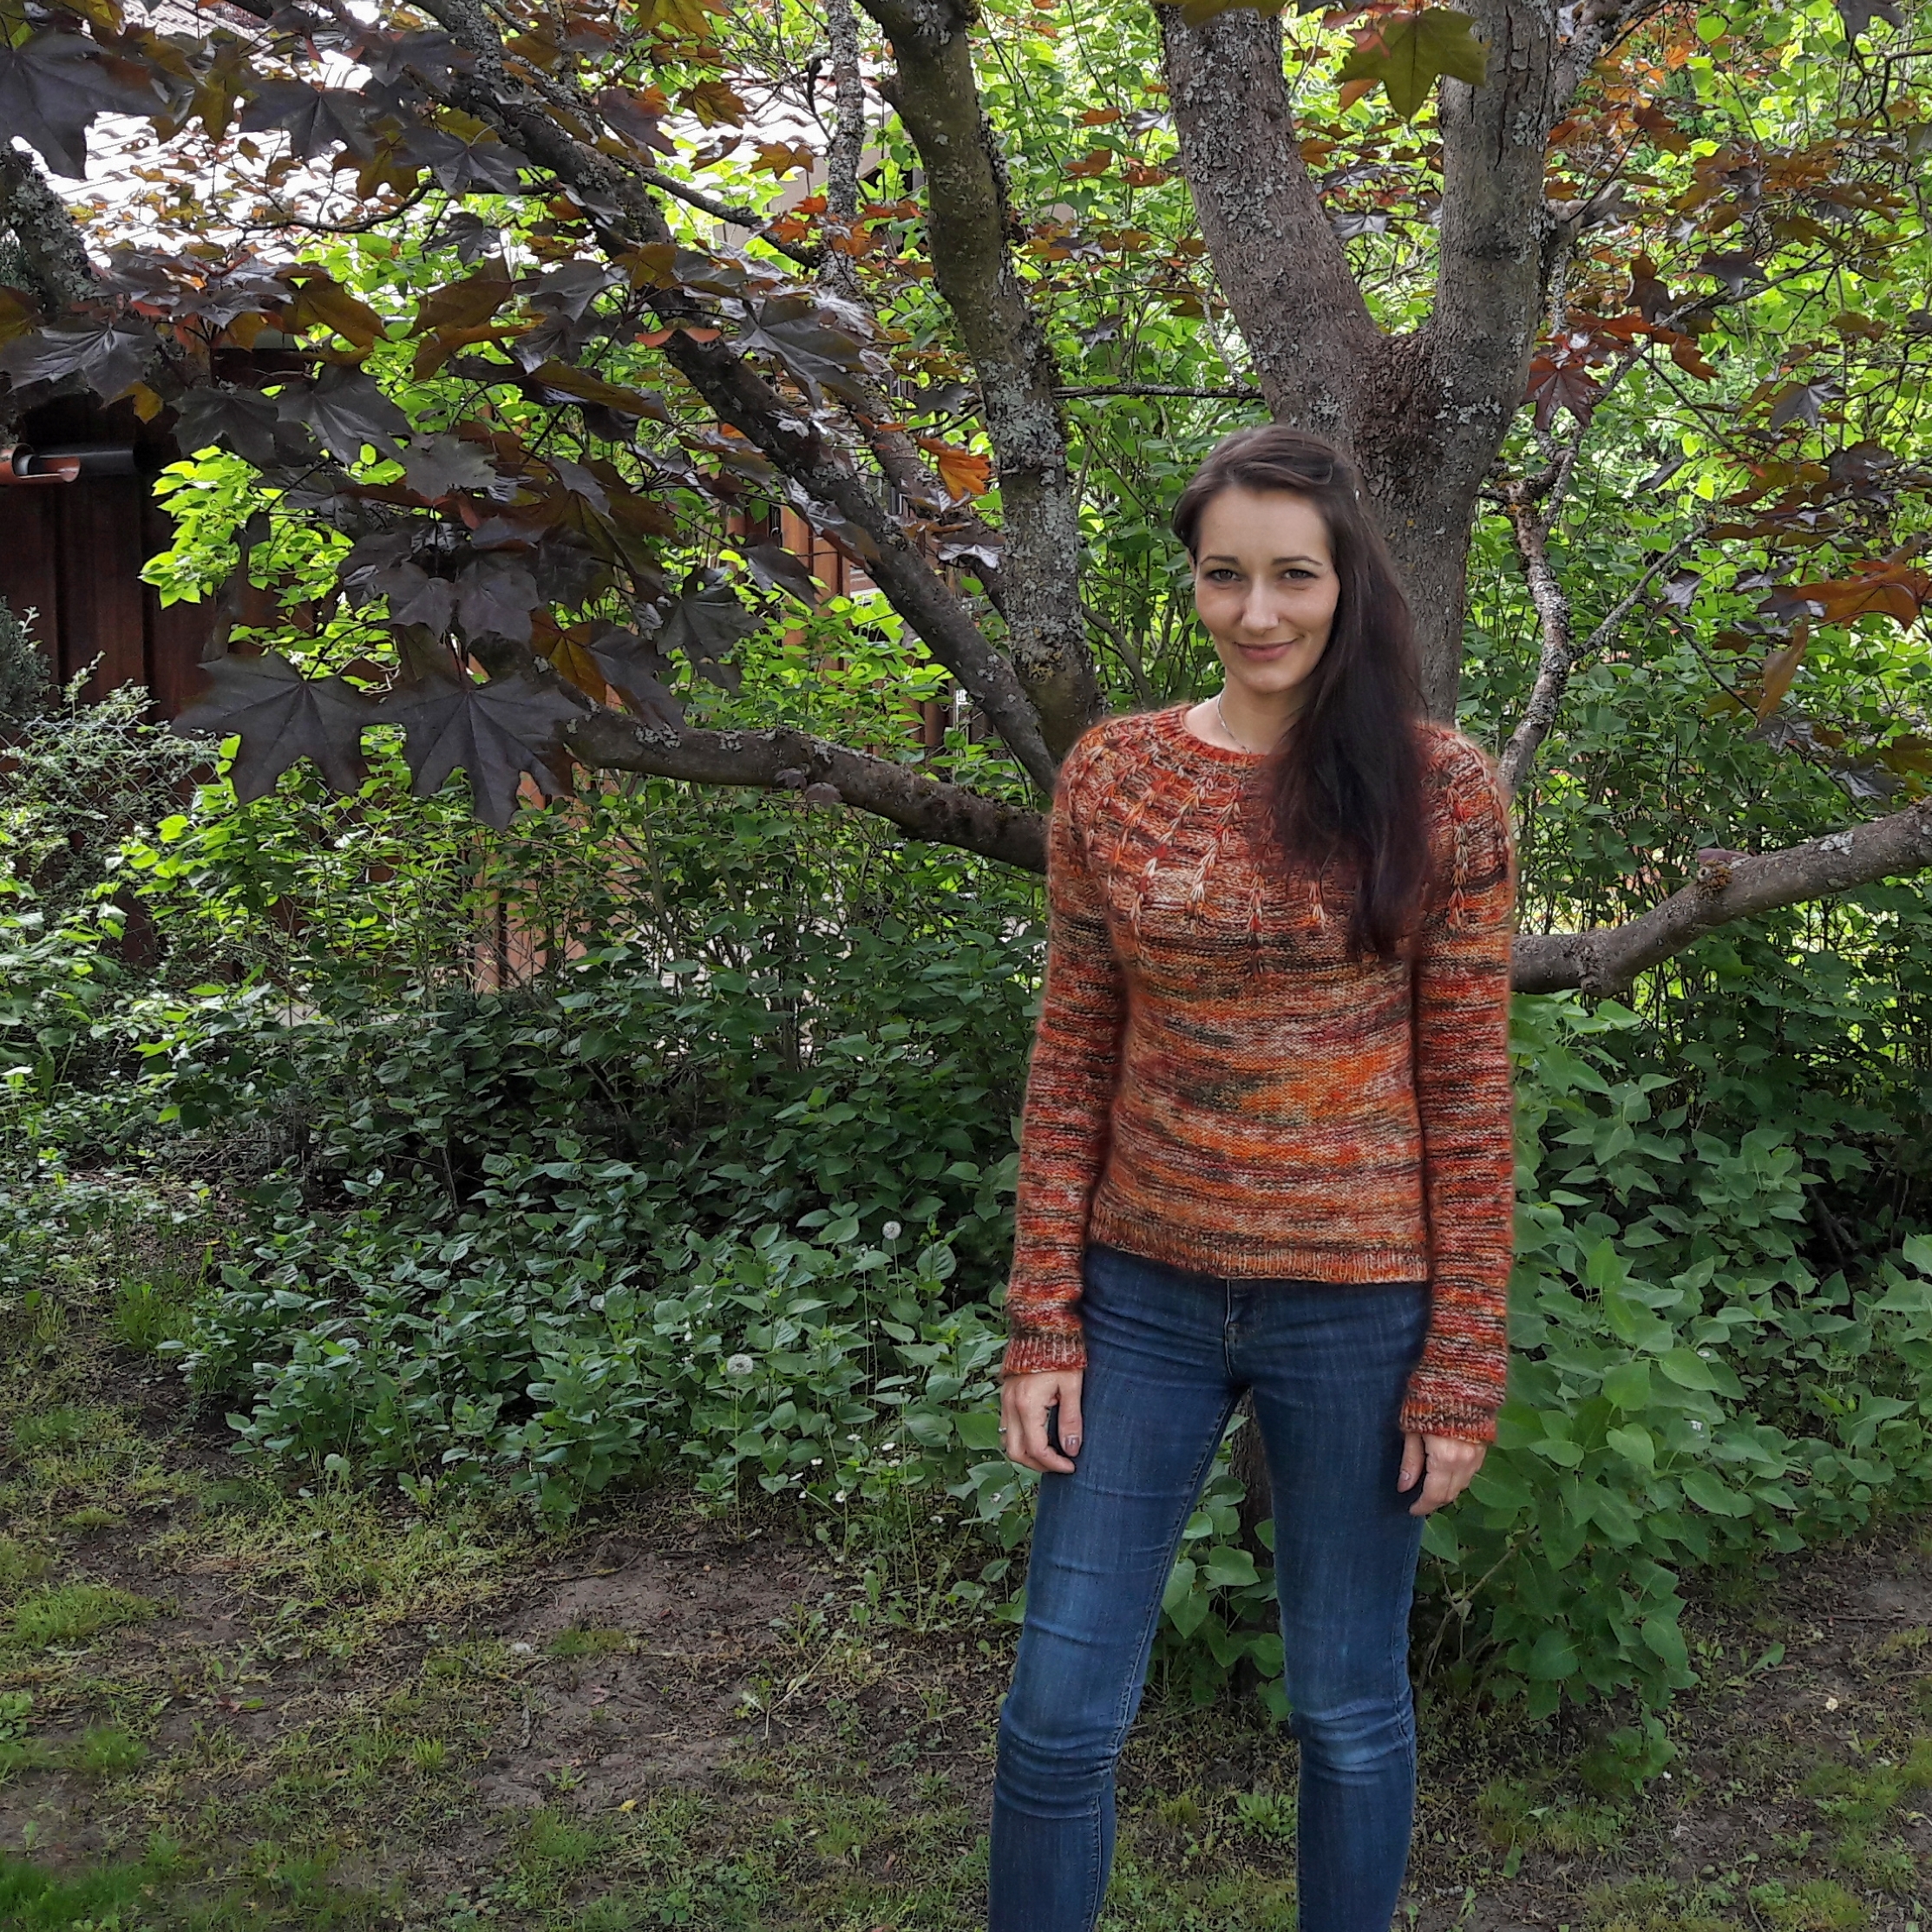
Hat man nur noch die Maschen für den Körper auf Nadeln, wird die Arbeit einmal gewendet und man strickt von der Innenseite aus weiter. Auch das ist sehr schlau durchdacht: Der Körperteil besteht ja aus reinen linken Maschen. Doch dreht man die Arbeit um, kann man einfach bequem glatt rechts in der Runde den Körper runterstricken. Hier musste ich mich nun entscheiden, wie lange ich den Pulli letztendlich haben möchte. Ich kam zu einer recht guten Lösung: nicht super lang, nicht cropped, eine mittellange Version, da ich den Pulli gern sowohl zu Kleidern als auch zu High Waist Jeans tragen möchte.
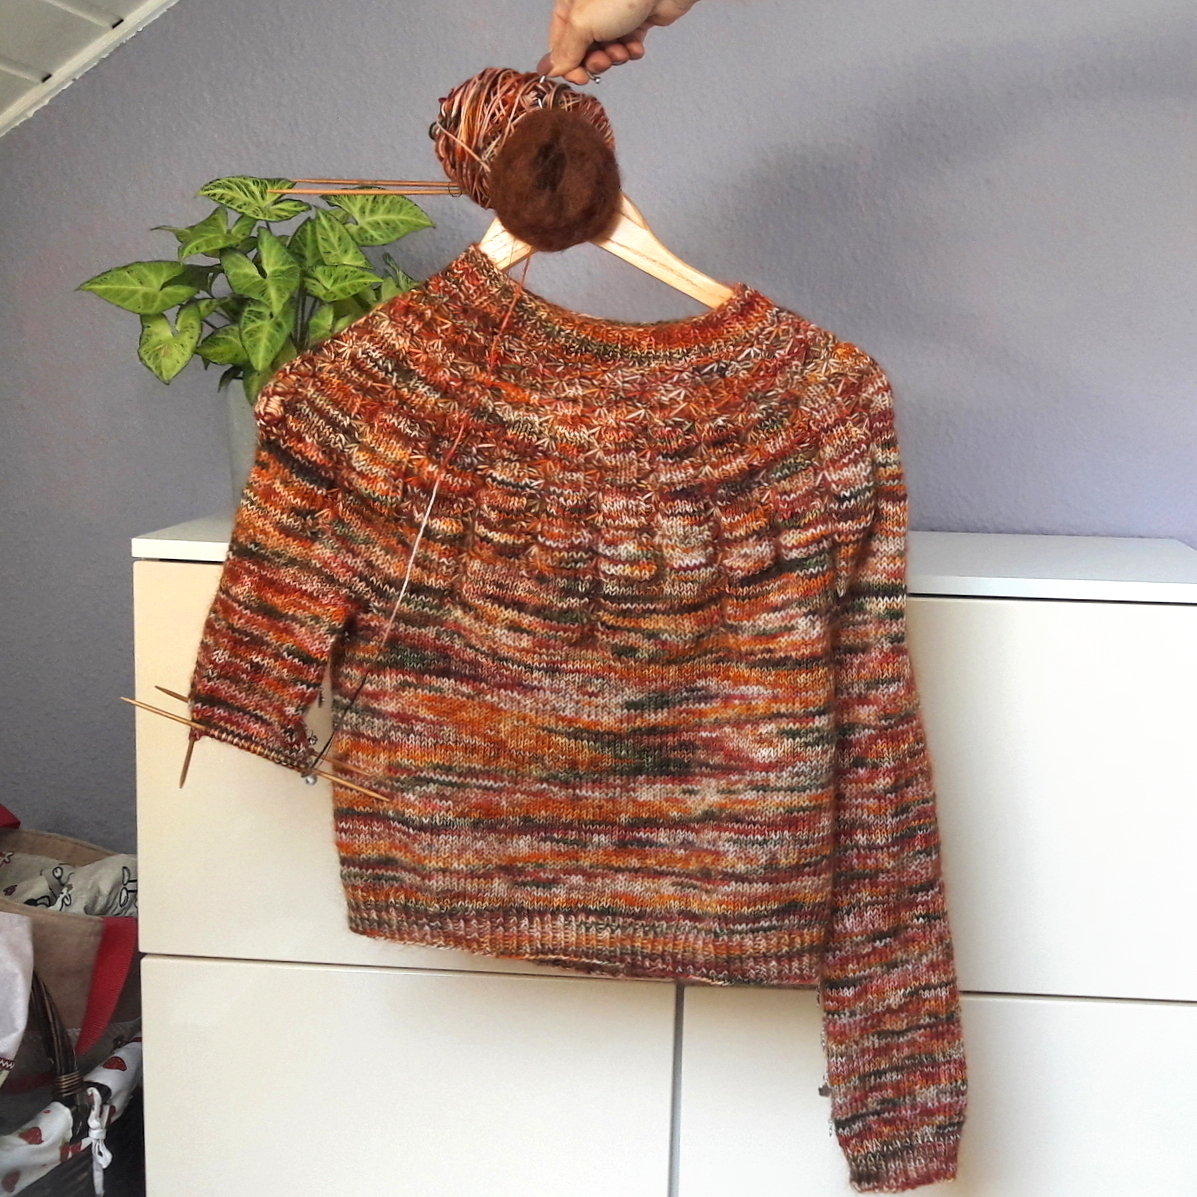 Bei den Ärmeln geht man genauso vor: Sie werden verkehrt herum gestrickt, also glatt rechts, damit die Vorderseite später hübsche linke Maschen hat. Was die Ärmellänge angeht, musste ich nicht viel nachdenken. Ich mag meine Ärmel gerne etwas länger als der Durchschnittsmensch - einfach weil ich eine schreckliche Ärmelzieherin bin :))
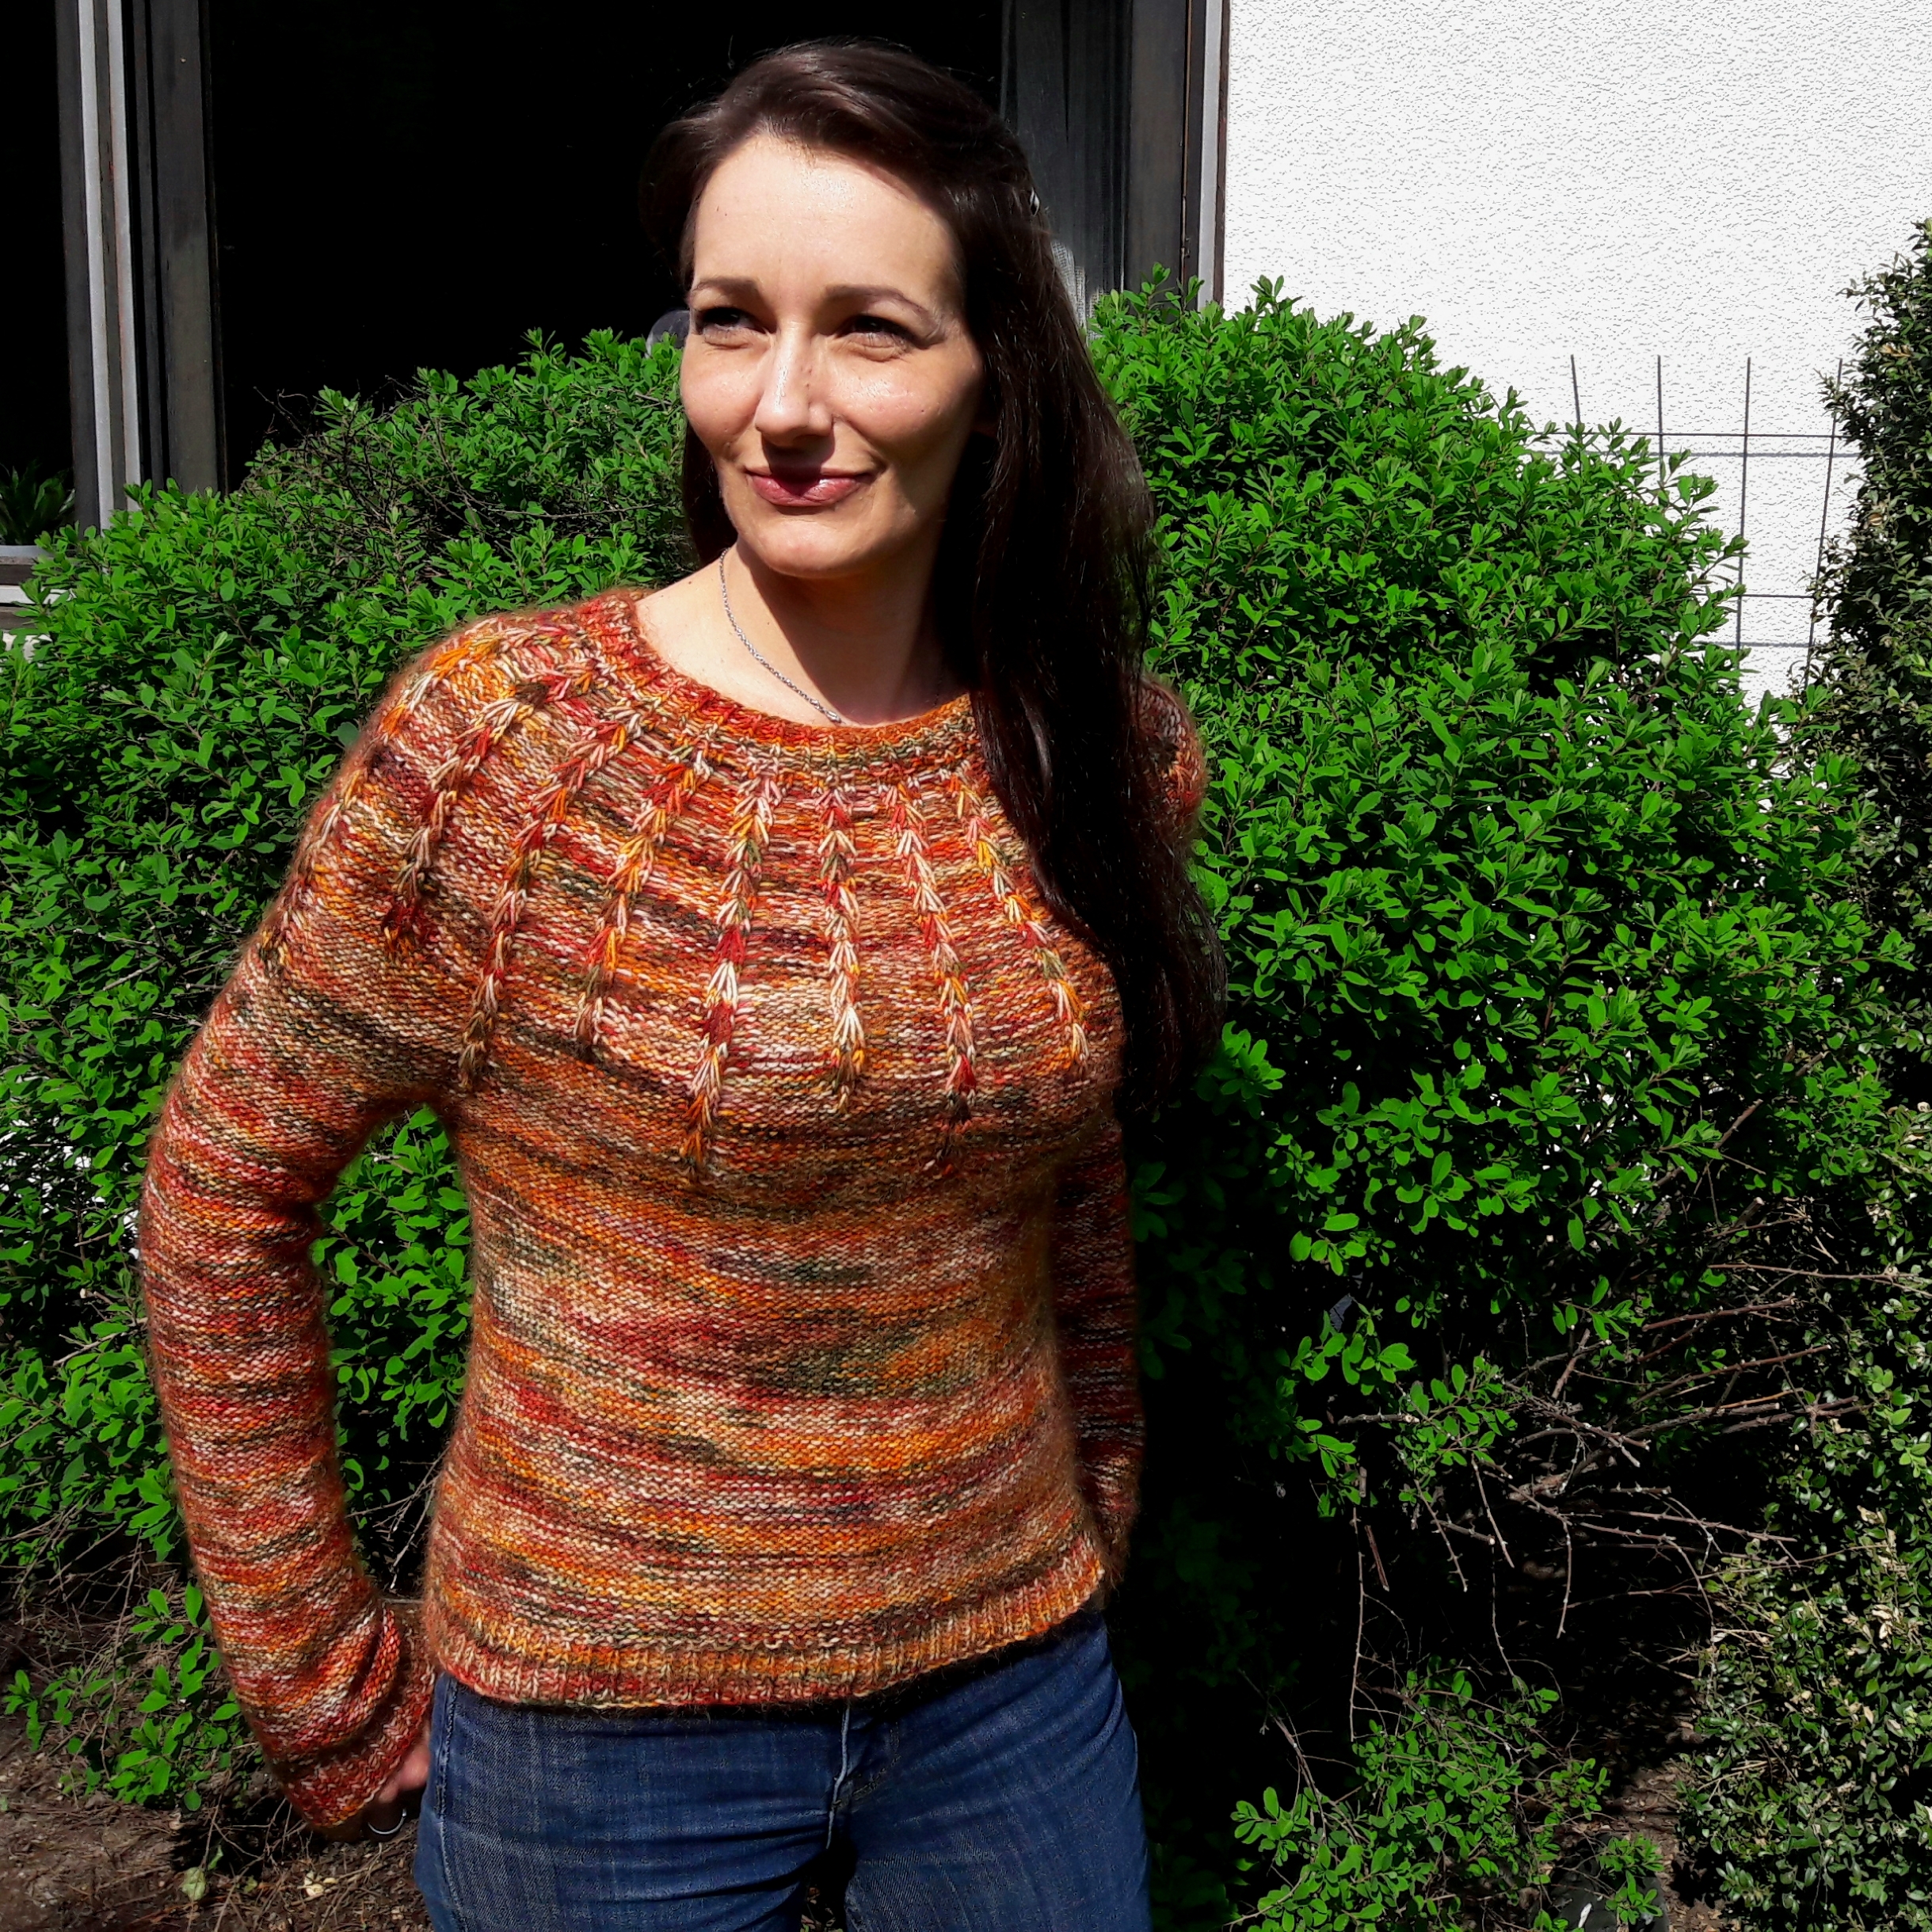
Der Rest war dann eigentlich ein Kinderspiel. Zumindest für den, der lesen kann *räusper*. Die Bündchen (Hals, Körper und Ärmel), werden in einem verschränkten Rippenmuster gestrickt. Damit man die verschränkte Masche auch sieht, muss die Arbeit zuvor natürlich wieder auf die rechte Seite (die mit den linken Maschen) gedreht werden. Beim Körper hatte ich das vollkommen vergessen, weshalb man da jetzt keine verschränkten Maschen sieht. Aber das ist okay, wird schon keiner merken, oder? Auftrennen war für mich nämlich keine Option! ;) Bei den Ärmeln habe ich dann dafür dran gedacht!
Einen anderen Schritt habe ich mir mit vollkommener Absicht erspart. Körper und Ärmel sollen jeweils mit der "sewn bind off method" abgekettet werden. Wer nicht weiß, was das ist, kann ja mal danach googeln. Die Suchergebnisse werden sehr gut begründen können, warum ich einfach locker im Muster abgekettet habe. Man will ja auch mal fertig werden ;)
Fazit: Das wird im Herbst mein absolutes Lieblingsteil werden!!!
 Hello everybody,
in my first YouTube episode, I said it out loud for the first time: I have actually planned to knit 12 sweaters this year! And today I can proudly show you number four: My Sorrel sweater! But before I tell you more about it, I would like to thank everyone who has already purchased a kit for the Sorrel. This week I am dyeing yarn like crazy for this design and I am looking forward to all the many pictures of your Sorrels!
Maybe the following report about my Sorrel adventure will be helpful for one or the other who is not quite sure yet whether he should knit this sweater. So, get yourself a drink, your knitting and have lot of fun reading ♥
I myself became aware of the Sorrel through Instagram. The first two months of this year my feed was full of incredibly beautiful knitting pictures of this sweater - one more beautiful than the other! I then went to Ravelry and took a closer look at the Sorrel pattern page. There I found out that Sorrel is designed by AbbyeKnits and DankFiber, who have formed a designer duo called Wool & Pine. Sorrel is only their second design and already they are so successful! The pattern is available in English and not also in French and Spanish.
 I was itching so much to cast on the sweater on and in mid-April it finally happened! From the beginning I knew which colours I wanted to have: The Soft Socks in the colourway Autumn Walk combined with the mohair yarn Extraklasse in the colour 4452. As soon as the yarn was caked up, I had swatched for my gauge . Spot landing! So I was ready to go.
That day it was beautiful and I wanted to knit outside on the terrace. Coffee, printed pattern, yarn, needles, everything you need. It worked wonderfully, the neckline was knitted quickly and then the pattern started. This one particular stitch is not explained in the instructions, but I saw that there was a link that leads me to a video tutorial. But I couldn't click on it, I only had the pattern on paper with me. Yes, of course I could have walked in and turned on the PC, but - I hope someone reading this will understand! - it was just so nice and comfortable outside. I was quite sure that I could do it without the video, using the pictures in the pattern. After about three pattern repetitions I realized that what I was doing was completely wrong. From that point on I only kept knitting out of defiance. Until I threw it my project bag and put it in the corner. Because it was clear that it had to be ripped off.
It took some time until I had the leisure to deal with my Sorrel again. Meanwhile I had already tried to unravel it, but with mohair this is almost undoable and for an impatient person like me, simply a thing of impossibility. But since I had looked at the tutorial now and it "clicked", there was no stopping now. So, important tip: watch the tutorial before you start!
 At the beginning I was a little bit worried about the size. In my case the knitted piece looked very small while I was working on the pattern. But: just trust the designers! The size indications are exactly right - provided that your gauge is correct! Unlike many German and European instructions, the sizes are not given in S, M, L, XL,... . And that is a good thing! If I have size M in the first shop, I go out the next shop with a piece in size L. This has happened to me many times before and I know that I am not the only one. So: If you write me that you would like to knit a sweater in size M and I ask you about your chest circumference, please don't be surprised ;) Because the chest circumference makes the most sense as a size indication! Therefore (because I get so many questions): please take a measurement of your chest and choose the kit for your Sorrel sweater based on these measurements.
But back to my project. I have to admit that I did not enjoy knitting the beautiful pattern that much at first. But I suppose that this was due to my unsuccessful start. Because as soon as the sleeves were put on hole, I missed the pattern :)
However, before the sleeves are put on hold, short rows are worked on the back. This will cause the back to be slightly higher at the end than the front. I was very pleased to see that the designers already use "german short rows" and I didn't have to convert anything. Often American instructions use the "wrap and turn" method, but unfortunately this results in unsightly small holes. So thumbs up for this pattern!
 Once you only have the stitches for the body on needles, the work is flipped inside out and you continue knitting from the inside. This is also very cleverly thought out: The body part consists of pure purl stitches. But if you turn the work inside out, you can simply knit down the body comfortably in stockinette stitch. Here I had to decide how long I wanted the sweater in the end. I came to a pretty good solution: not super long, not cropped, a medium length version, because I would like to wear the sweater with dresses as well as with high waist jeans.
The sleeves are done the same way with the work flipped inside out i.e. you do many knit stitches, so that the front side has nice purl stitches in the end. As far as the sleeve length is concerned, I did not have to think a lot. I like my sleeves a bit longer than the average person - simply because I am a terrible sleeve puller :))
The rest was actually a piece of cake. At least for the one who can read *clearing-my-throat*. The cuffs (neck, body and sleeves), are knitted in a twisted rib pattern. In order to see the twisted stitches, you have to turn the work back to the right side (the one with the purl stitches). I completely forgot to do this with the body, which is why you won't see any twisted stitches there now. But that's okay, nobody will notice, right? Because ripping was not an option for me! ;) At least I didn't forget to do this for the sleeves!
Another step I saved myself with perfect intention. Body and sleeves should be bound off with the "sewn bind off method". Who does not know what this is, can google for it. The search results will explain very well why I simply bound loosely in pattern. You want to finish once in a while ;)
Conclusion: This will be my absolute favourite piece in autumn!